Thought Leadership
Manage your marketing collateral workflow

Distributing marketing collateral for an omnichannel marketing campaign can easily become a complex web of project management, spreadsheets, and endless email trails. Many project management tools like Monday.com, Wrike and Asana claim to fill this need. But they lack the functionality to manage artwork, reformat it, sign it off, and distribute it to various channels. So inevitably, you turn to additional solutions. But what workflow should you use to get marketing collateral signed off and distributed to your various online and offline channels?
Generally, a marketing collateral workflow will follow 6 main steps; creating a campaign brief, artwork design & sign-off, customising artwork for different channels, distributing artwork, executing campaigns in-channel, and analysing performance. This workflow ensures brand consistency across different marketing channels within the campaign and supports continuous improvement.
The image below shows the process of this work. Let’s break down each of the steps in more detail.
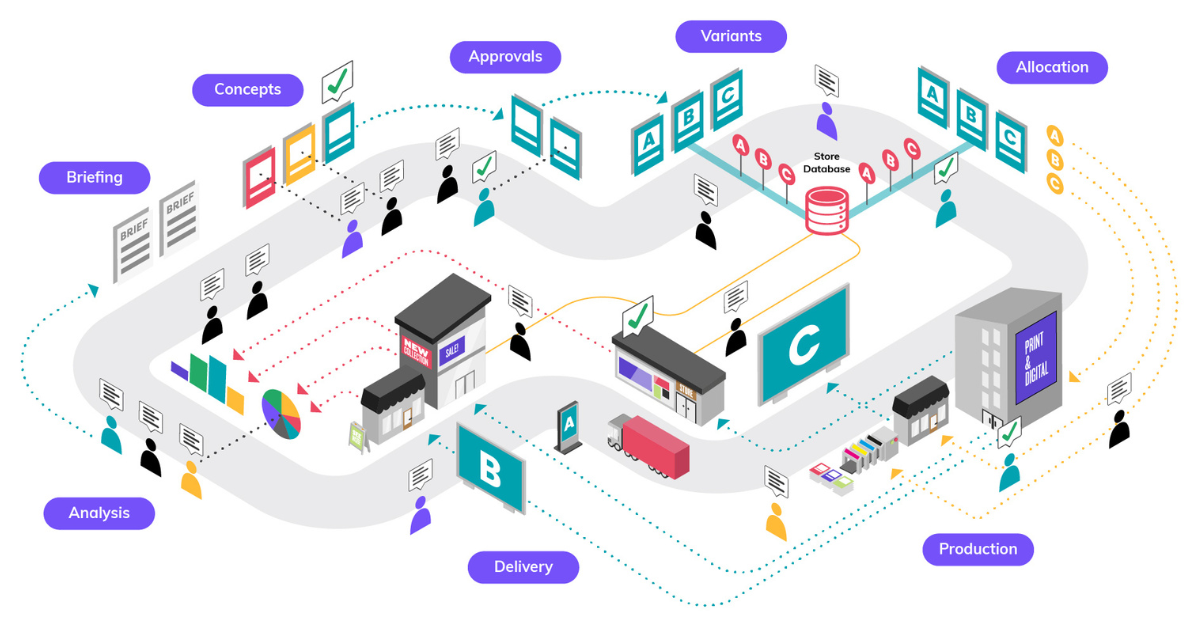
Marketing Collateral Workflow for Digital and Print Campaigns
The first step in your collateral workflow will be creating your campaign brief. Your campaign brief will outline the critical information for the campaign, including objectives, messaging, channels and any design direction. As your campaign will involve multiple stakeholders, your brief will ensure all parties have the correct information to execute their parts.
A good campaign brief will include the following:
This brief needs to be accessible to everyone involved in the project and updated as any changes occur. This will be the single source of truth.
Project managers may also break this down into individual tasks for each team or person using a tool like Monday.com or Asana.
While other teams may work on different project components, the next step in your marketing collateral workflow will be to design the artwork.
If you do not have artwork direction in the brief, designers and copywriters will need to collaborate to bring the core message to life in an imaginative way. A good understanding of the target audience and close collaboration between all parties is critical.
This is one of the key challenges with spreadsheets and traditional project management tools. When teams were in the office together, it was straightforward to share inputs and get feedback from team members. You simply sit around a whiteboard to share ideas, attach post-its to ones you like, draw on printouts, or gather around the designer’s screen.
However, as we work more remotely, it’s increasingly important to facilitate remote collaboration on artwork.
Tools like Miro (a collaborative whiteboarding application) can facilitate this collaboration very well. However, transitioning this back to associate it with your campaigns and projects becomes difficult.
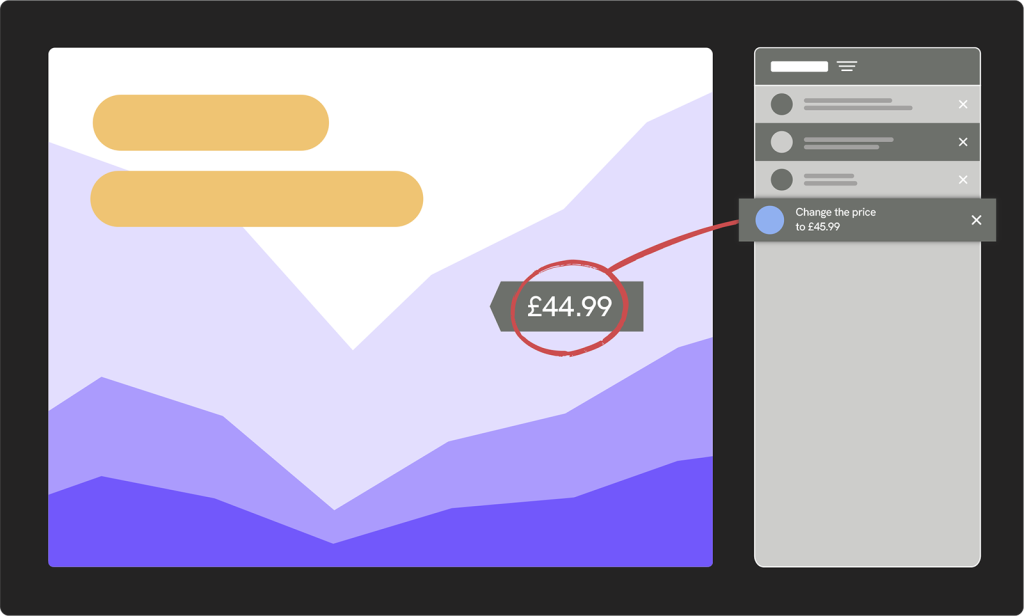
Instead, a tool like Colateral can facilitate creative collaboration and artwork approval across the whole team. It allows design teams to work in the Adobe suite or Quark and share previews with marketing, brand, and other design teams for feedback. People can provide feedback and attach comments to the design for further revisions. And every iteration is recorded on the system against the campaign. So if you wanted to return to a previous version, you could.
You learn more about Colateral’s artwork management system here.
Once your design is signed off, you must create variants for different channels. Even if you are only distributing on social media channels, each has its own dimensions for artwork, and the audiences expect different content on each channel.
This is even more true when balancing digital and print channels or running your campaign in-store. While several channels can use the same image in different shapes and sizes, some pieces of marketing collateral require a new design altogether.
With a tool like Wave2, designers can automatically customise designs for different shapes and sizes based on each channel. So, when you have 1 design that needs versions for window displays, vertical social media posts, square social posts, digital display ads or the side of a bus, the system automatically resizes and organises the attributes in the design to create variations that fit.
In addition, you may need to translate campaigns into different languages and adjust the straplines for different types of buyers.
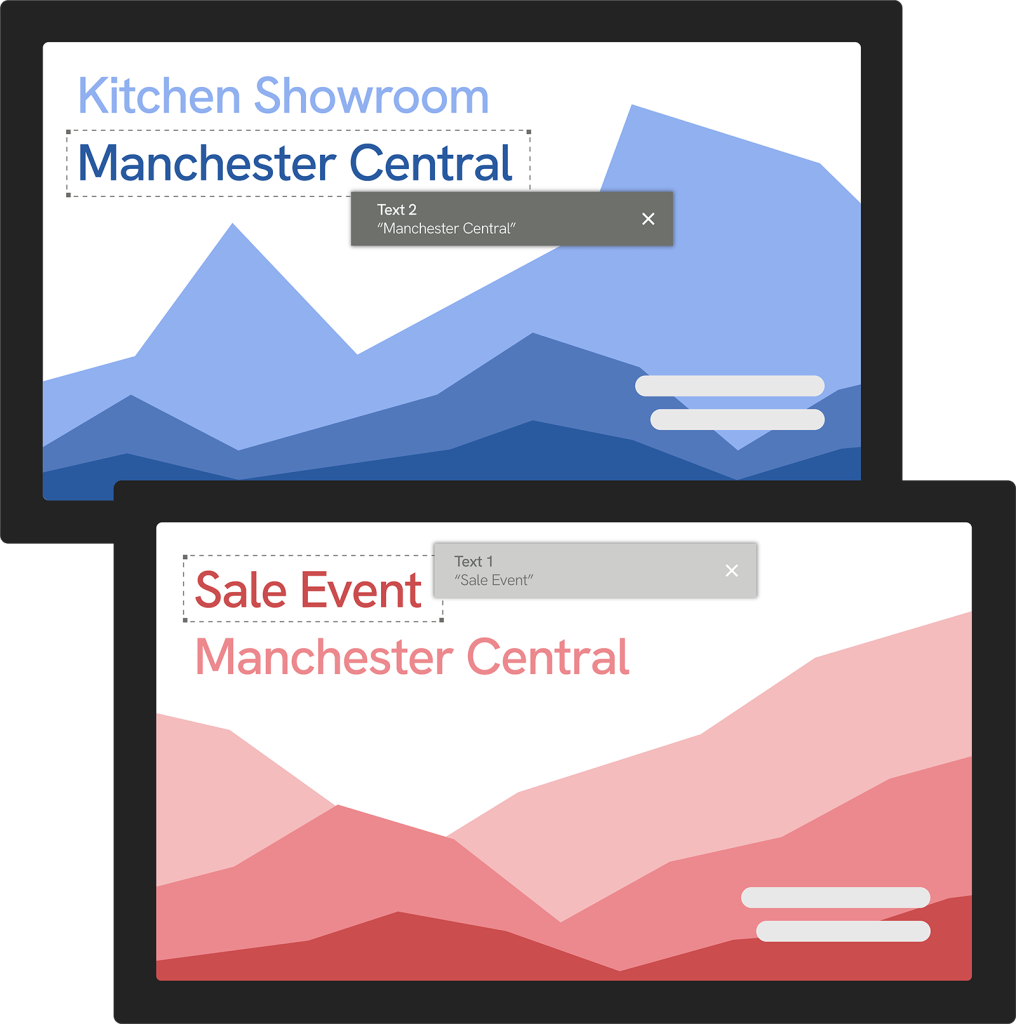
In these situations, you can create a smart template with editable fields within Adobe InDesign. So designers can create a single on-brand design and set certain text fields or images as editable fields. Marketers, social media managers or store managers can edit this text to make it perfect for their audience. See an example below of the same artwork promoting a new kitchen showroom, but the location name has changed from London to Manchester. This approach helps it feel more unique to the local store and will attract more of the local community because it feels personal to them and their store.
Colateral brings all of these together, associating designs with the campaign, and each variation to specific locations. So, when it comes to ordering, you reduce the chance of sending assets to the wrong places. You can learn more about how Colateral for localised marketing.
The next step is distributing your marketing collateral to the right locations and channels. You have designed your core assets and regional variations, but now you must deliver them to the right places.
This often requires copious spreadsheets to ensure the right localised messages reach the right locations. However, if you used a tool like Colateral mentioned above, the designs will already be allocated to the places they need to be implemented.
Assuming you don’t have Colateral, distributing your digital campaigns could be as simple as sharing a Google Docs folder with the designs for each team member to choose from.
However, it’s not enough for print campaigns to send designs to the printers. You must also specify which locations each printed design needs to go to. If it’s out-of-home, it should include each billboard’s location. Additionally, if you’re running local social media for different regions, you will need to allocate them too.
If you’re distributing your campaign in-store, the localised materials must be distributed in marketing packs with other communications to the right stores. You will need a detailed store profile management system to achieve this. Balancing spreadsheets and old database systems won’t cut it if you wish to localise messages to different locations.
We talk more about why you need a dynamic store profiling system here.
The execution stage is where you hand over your artwork templates to channel experts who turn them into the final marketing collateral.
This will mean adding text to the post on social media channels or printing the design onto the right materials for in-store campaigns.
As the central marketing and design team, it’s critical that you have visibility of the final execution across all channels. This requires establishing a robust auditing process for your channel teams to record the final execution and report back to you.
We encourage issuing questionnaires to be completed after the campaign goes live. It should include the following:
We recommend this article to learn how to record and measure the display compliance of your campaigns.
By collating this information, you can identify and resolve issues efficiently across all channels without needing to go around and check them. In addition, when reviewing campaign performance later, you will have records of all the final execution of campaigns to evaluate how they went out cross-channel.
Additionally, this provides full traceability of the campaign throughout the campaign lifecycle.
Finally, once you have completed the campaign, you must analyse its performance.
You will need to analyse results on a campaign level, on a channel level, and on each placement. This will allow you to dissect where the collateral was most effective, which audiences it resonates with, and on which channels.
In addition, you will need to provide different levels of visibility to stakeholders. Your head of marketing will need to see the overall breakdown, regional managers should see the areas they are responsible for.
For more information, this article discusses how to analyse the effectiveness of in-store marketing campaigns.
If you would like weekly tips and insights on how to manage your collateral workflow, please subscribe to our mailing list.
 Thought Leadership
Around in-store marketing, there is a constant debate about which is more important: Where your...
 Thought Leadership
Despite the rise of e-commerce, 80% of purchases still happen in stores. And retailers produce...